Ultimate Website Launch Checklist: 12 Things To Check in 2026

Launching a website is nerve-wracking. After months of design and development, your business’s digital future comes down to those final pre-launch checks. Miss something important and you risk broken functionality, poor user experience, or invisible pages that never rank in search results.
We’ve launched hundreds of websites since 2007, and we’ve seen every possible launch disaster. This checklist will help you avoid those pitfalls and launch with confidence. Here are the 12 non-negotiable checks that separate successful launches from expensive mistakes.
SSL Certificate Setup and Security

Your SSL certificate is your first line of defence against user abandonment. When visitors see that dreaded “Your connection is not private” warning, 85% will leave immediately. Search engines also penalise unsecured sites, making SSL essential for both user trust and SEO performance.
Most hosting providers include SSL certificates, but don’t assume yours is working. Test your site’s security by visiting it with HTTPS in the URL. Look for the padlock icon in your browser’s address bar. If you see “Not Secure” instead, contact your host immediately.
Set up 301 redirects from HTTP to HTTPS versions of all your pages. This ensures users and search engines always land on the secure version, maintaining your site’s authority and user experience.
Backup Systems and Recovery Plans

Website disasters happen. Servers crash, updates break functionality, and hackers target new sites. Without backups, you’re gambling with months of work and investment.
Implement automated daily backups that store copies offsite. We recommend keeping at least 30 days of backup history. Test your restore process before launch – a backup system that doesn’t work when needed is worthless.
Document your backup schedule and recovery procedures. When problems strike, you need clear instructions, not guesswork under pressure.
Analytics Integration and Tracking Setup

Launching without analytics is like driving blindfolded. You need data to understand visitor behaviour, identify problems, and measure success. Install Google Analytics 4 (GA4) before launch so you start collecting data immediately.
Set up Google Search Console to monitor your site’s search performance. This free tool shows which keywords drive traffic, identifies indexing issues, and alerts you to technical problems.
Configure conversion tracking for your business goals. Whether that’s form submissions, phone calls, or purchases, tracking conversions helps you understand which marketing channels deliver results.
Navigation and Internal Link Testing

Broken navigation kills user experience faster than slow loading times. Test every menu item, dropdown, and internal link across your site. A single broken link in your main navigation can cost you customers and damage your professional credibility.
Focus on these five essential pages: Home, About, Services/Products, Blog, and Contact. These form the foundation of most user journeys. Ensure visitors can reach any page from your homepage within three clicks.
Test your navigation on different devices and screen sizes. What works on desktop might be unusable on mobile. Pay special attention to dropdown menus and hamburger navigation – these often break on smaller screens.
Custom 404 Error Page Creation
404 errors are inevitable, but they don’t have to be conversion killers. Design a helpful 404 page that keeps visitors engaged instead of sending them to competitors.
Include these elements on your 404 page: a clear explanation of what happened, a search box to help users find content, links to popular pages, and your contact information. Make the tone match your brand – professional businesses might use apologetic language, while creative brands could inject humour.
Monitor 404 errors in Google Search Console and fix the most common ones. If multiple pages link to a non-existent URL, either create that page or redirect the traffic somewhere relevant.
Content Proofreading and Brand Consistency
Typos and inconsistent messaging undermine your professional credibility. Read every page aloud or use text-to-speech software – you’ll catch mistakes your eyes miss when reading silently.
Check brand consistency across all content. Your tone, terminology, and key messages should align with your brand guidelines. Inconsistent messaging confuses visitors and weakens your positioning.
Verify contact information appears correctly on every page where it’s mentioned. Double-check phone numbers, email addresses, and physical addresses. Incorrect contact details cost you leads and frustrate potential customers.
Mobile Responsiveness and Device Testing
Mobile devices generate over 55% of web traffic, yet many sites still prioritise desktop experience. Test your site on actual mobile devices – emulators miss real-world issues like touch targets, loading speed, and readability.
Check these mobile-specific elements: buttons are large enough to tap easily, text is readable without zooming, forms work smoothly, and images load properly. Pay attention to loading speed – mobile users abandon sites that take longer than three seconds to load.
Test on different mobile operating systems and screen sizes. Android and iOS render websites differently, and what works on an iPhone might break on Samsung devices.
Cross-Browser Compatibility Verification
Your website needs to work across all major browsers: Chrome, Safari, Firefox, and Edge. Each browser interprets code differently, creating potential display and functionality issues.
Test these elements across browsers: layout consistency, form functionality, image display, and interactive elements like dropdown menus or sliders. Focus extra attention on Safari if your audience includes Mac users – it often handles CSS and JavaScript differently than Chrome.
Use browser developer tools to identify and fix compatibility issues. Most problems stem from unsupported CSS properties or JavaScript functions that work in some browsers but not others.
XML Sitemap Generation and Submission
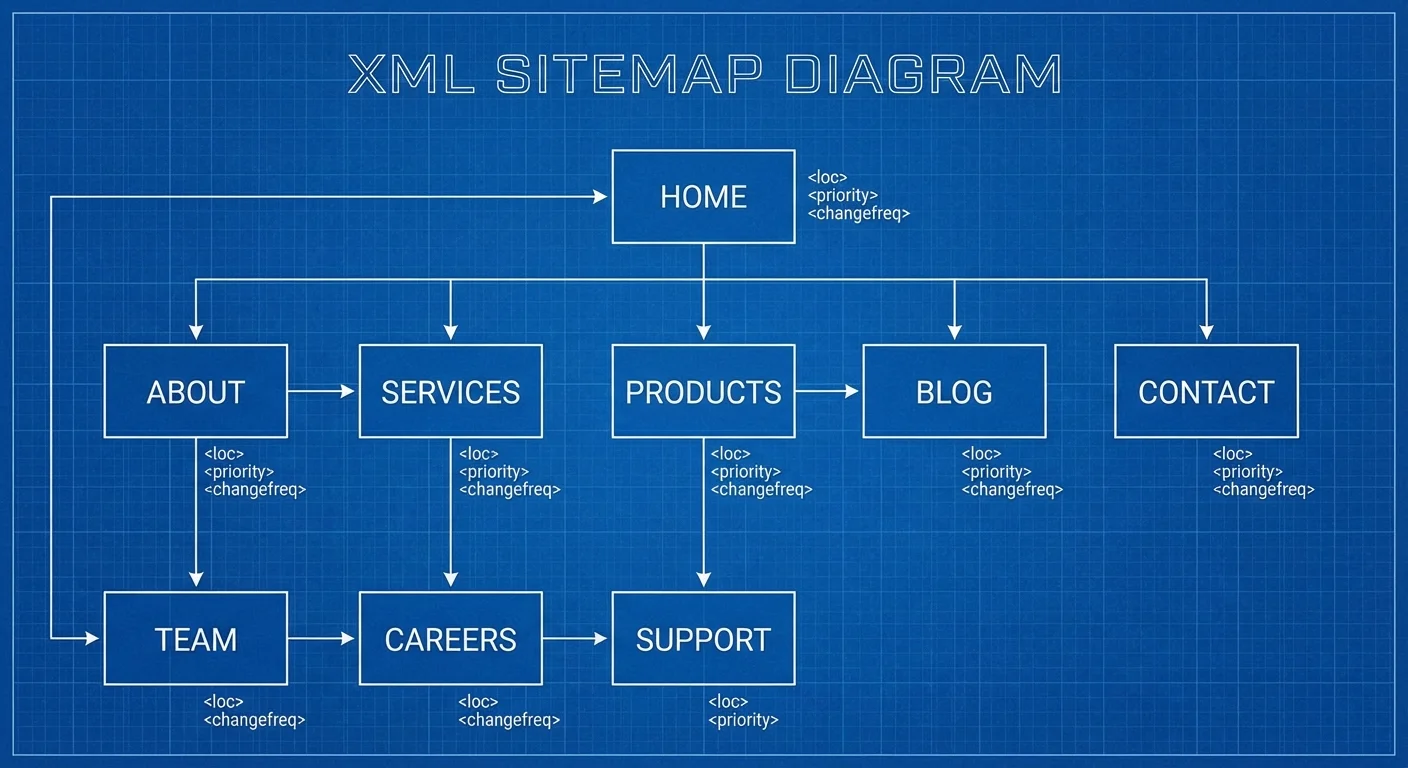
Your XML sitemap tells search engines which pages to index and how your site is structured. Generate a sitemap that includes all important pages while excluding duplicate content, thank-you pages, and other pages you don’t want ranking.
Submit your sitemap to Google Search Console and Bing Webmaster Tools immediately after launch. This speeds up the indexing process and helps search engines discover your content faster.
Set up automatic sitemap updates if you’re using a content management system. Your sitemap should reflect new pages and content changes without manual intervention.
Page Metadata Optimisation
Every page needs unique, compelling metadata that encourages clicks from search results. Write title tags under 60 characters and meta descriptions under 155 characters – longer versions get truncated in search results.
Include your target keyword in both title tags and meta descriptions, but write for humans first. Your meta description should read like compelling ad copy that makes people want to click through to your site.
Avoid common SEO mistakes like duplicate meta descriptions or keyword stuffing. Each page should have distinct metadata that accurately reflects its content and purpose.
On-Page SEO Implementation
Optimise every page for search engines without sacrificing readability. Use clear heading hierarchies (H1, H2, H3) that help both users and search engines understand your content structure.
Create SEO-friendly URLs that include relevant keywords and reflect your site’s hierarchy. Avoid generic URLs like “page1.html” or long strings of numbers. Good URLs help users understand where they are on your site.
- Optimise images with descriptive alt text and compressed file sizes
- Include target keywords naturally in your content
- Internal link between related pages to distribute page authority
- Add schema markup to help search engines understand your content
Technical SEO Audit and Fixes
Technical issues can sink your SEO performance before you even start. Run a full technical audit to catch problems that hurt your search rankings.
Check your site’s loading speed using Google PageSpeed Insights. Pages should load in under three seconds, preferably faster. Compress images, minify code, and enable browser caching to improve performance.
- Verify all pages have unique title tags and meta descriptions
- Scan for duplicate content issues
- Test all internal and external links
- Confirm proper heading tag hierarchy
- Check for crawl errors in Search Console

Final Launch Preparation
You’ve completed the technical checks – now prepare for launch day. Create a launch timeline that coordinates with your marketing campaigns and allows time for immediate post-launch monitoring.
Set up monitoring alerts for your website uptime, traffic spikes, and form submissions. You want to know immediately if something breaks after launch, not days later when frustrated customers complain.
Working with an experienced Perth web design agency can help you avoid launch-day surprises. Document your launch process for future projects. Note what worked, what didn’t, and any issues you encountered. This knowledge becomes invaluable for your next website launch.
Frequently Asked Questions
How long before launch should I start this checklist?
Start your pre-launch checklist at least one week before your planned launch date. This gives you time to fix any issues without rushing or delaying your launch.
What happens if I skip the SSL certificate check?
Without SSL, browsers will warn visitors that your site is not secure, causing most people to leave immediately. Search engines also rank unsecured sites lower in results.
Do I need to test on every browser and device?
Focus on the major browsers (Chrome, Safari, Firefox, Edge) and test on both desktop and mobile devices. Check your analytics to see which browsers your target audience uses most.
How do I know if my site speed is good enough?
Use Google PageSpeed Insights to test your site speed. Aim for loading times under 3 seconds, with scores above 80 for both mobile and desktop performance.
Should I launch if I find minor issues?
Minor cosmetic issues won’t hurt your launch, but fix broken functionality, missing SSL certificates, or major navigation problems before going live.
What’s the first thing to do after launching?
Monitor your site closely for the first 24-48 hours. Check that forms work, analytics track properly, and users can navigate successfully. Address any issues immediately.